
Today we made haunted "gingerbread" houses out of graham crackers, something that has become a halloween tradition for us. I always get asked how they are put together, so I thought I'd just do a little tutorial on it. (Btw, the pictures weren't that great, so I went with some funky processing - that's why they look funny!)
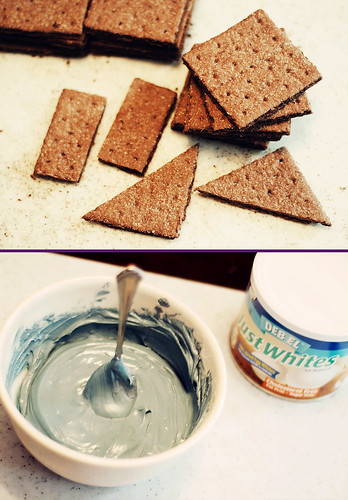
You will need graham crackers (8 squares/house), royal icing, and candy. I save all the yucky candy no one eats after halloween and Christmas just for this purpose! It's recycling - good for the earth!
Prepare your graham crackers for each house by using a serrated knife to cut one square in half lengthwise to make small rectangles and one square in half diagonally to create 2 triangles. You can use any royal icing recipe, but I make up my own by using approx 2 cups of powdered sugar, 2 T of powdered egg whites, and water. You want your icing to be pretty thick so that it holds together well. This year we went with purple icing that turned out to be more of a grey - all the spookier right!? I put the icing in a ziplog bag and snip the corner to make it easy to pipe.
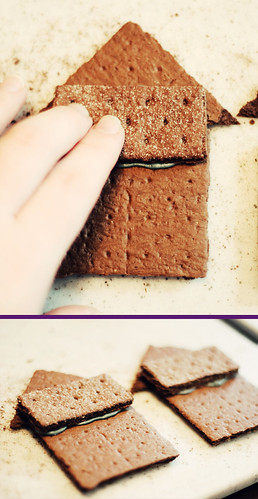
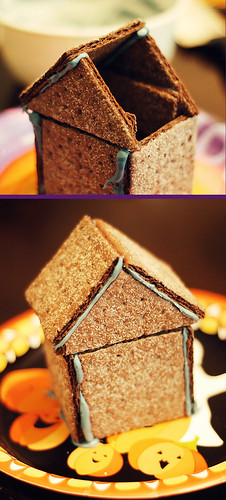
For each house, you will need two sides with triangles to help support the roof. Lay a square down with a triangle piece above it and apply icing to one of your rectangular halves. Place the half where the triangle and square join together. This provides support and also binds the triangle and square together. Just be sure that your rectangular half isn't sticking out past the other pieces.
Next, add squares to the sides of the new triangle side pieces. After applying the two square sides, I find it's the best time to stand the structure up. Once your sides are all joined, apply some icing to the bottom of the house and stick it to a paper plate. Once everything dries, it keeps the house from sliding around.
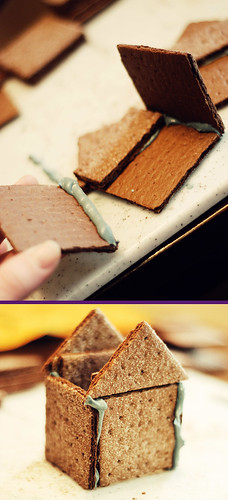
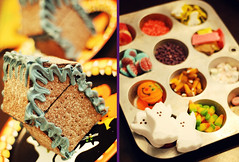
After you have erected your house, it's time to add the roof. Simply pipe beads of icing along the edges of each roof square.
Once your structure is complete, you can add some decorative icing. Let the structure dry and harden before applying additional decorations. Drying time is the perfect time to prepare your candy...
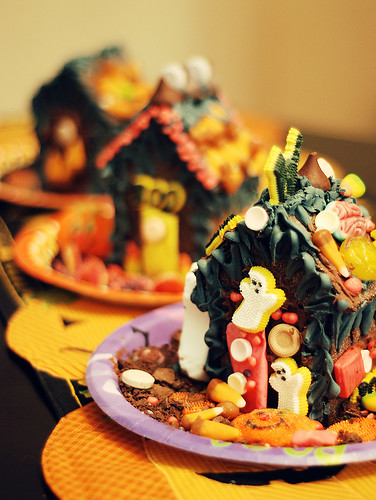
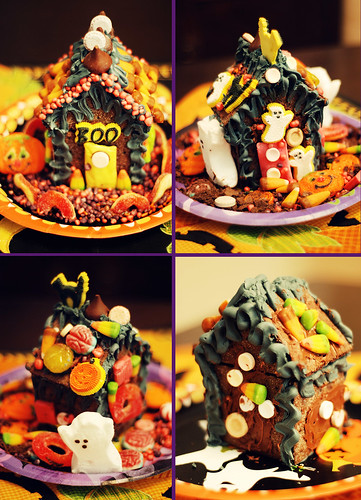
Once your house is dry and the candy is ready, the kids can go to town decorating!! I simply smeared some leftover chocolate frosting on each side of their houses so that it was easy for them to stick the candy on. You can also apply icing to each individual piece for a cleaner look. (The twins were much more interested in eating the candy!)
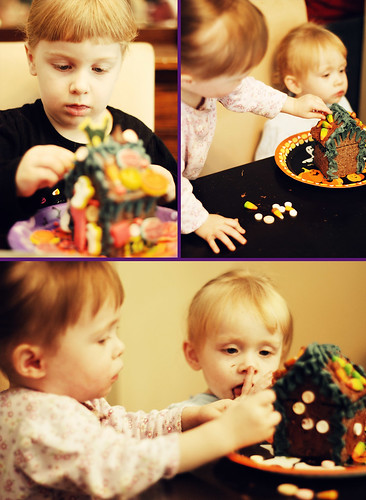
Remember, this is halloween, so the more candy, the better!!!!


3 comments:
Too cute! And I can't believe how big the twins have gotten!
(lol- the word verification thing I have to type in at the bottom of this is "foodr". hehe)
GET OUT OF TOWN, mother of the year! these are fantastic!!!!!!! we painting pumpkins, cut them out and hung them up and i thought i was cool for that. haha. awesome!
Those look like so much fun and yummy too.
Post a Comment